Sunday, June 25, 2017

The Next Part - Yoke Circle 13


The motifs in this yoke by Phyllis Sparks are somewhat arbitrarily numbered.  The piece in the previous post is "Yoke Section 11" and this one is "Yoke Circle 13."

The first motif for the yoke went smoothly.  This section did  not. I think it took me 5 tries to get it right.  First it was not laying flat at Round 3, and once I got past that, it was again cupping at Round 5.  Keep in mind that the bare thread spaces for this pattern need to be very short.  I seem to have some trouble with that concept.  Once I figured it out, I got the other side done in just one try.  

If you contemplate working this yoke, be advised that the patterns are diagrammed with some text comments.  Most of the joins are not described, so you have to consult the photos very carefully to see where to join.  Also, it up to you to make the second side a mirror image of the first, especially critical in this piece, with the way the rings are thrown off on the last round.  Just commenting, not complaining.  I'm still enjoying the challenge.

Monday, June 19, 2017

Back to the Yoke

 I'll put the mignonette rose doily on hold while I work on writing up the pattern.  Meanwhile, I'll go back to the yoke I was working on when I got distracted by the doily.


The yoke comes from "Practical Tatting" by Phyllis Sparks.  Used copies aren't too hard to find.  It has quite a lot of edgings, some doilies, a few nice collars, and this exquisite yoke.  Patterns are diagrammed in a style different from the norm, but easy enough to follow once you get used to them.  Patterns have more cut and ties than preferred by the modern tatter, but usually not too hard to get around by substituting split rings etc.


Here is the entire yoke as pictured in the book.  There are (I think) 86 individual motifs made from 17 patterns.  This was to be more than just a project for me, but more of a tatting meditation.  Is "centering" the right word?  I wanted something old fashioned and elaborate.  First, I must make each section correctly, which is sometimes as much about matching the designer's tension and picots as well as following the pattern.  Next, all the pieces must fit together. Lastly, I must have the perseverence to complete the project.

Mrs. Sparks writes that you make make the motifs in any order you wish.  She began with the large circle near the top and then the bow shaped strip around it.  I decided to begin with the large oblongs that go over the shoulders. I thought working a large section would tell me if I could follow her patterns and enjoy them.


So far, so good.


I didn't make a scan with a black background way back then, but since then I found out some of you preferred the dark background, so I tried to photoshop it.


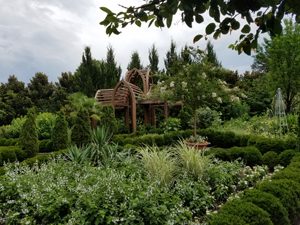
Meanwhile, DS3 and I visited the Sarah Duke Gardens in Durham.


There are several sections, with different themes.


We didn't see it all.


Highly recommended, we will be back.


Tuesday, June 13, 2017

Another Bit of Salvage


When I was almost done with one of the motifs of the rose doily, I made a Dreadful Mistake and had to cut away.  The rings are so small I did not think I could add in thread without making an ugly blob, so I just set that piece aside.  Later I went around the edge making split chain like wrapped stitches.  It was a bit tedious and time consuming, but a very dainty effect.


Here's another background.

(Later on, when I broke the thread trying to open a ring, I did try adding in a new thread, and it was not too bad.)

Have you planned your tatting get-away for this year?  Registration is now open for Palmetto Tatters Tat Days in Toccoa, Georgia, September 7-10, click for information HERE.

and for Fringe Element Tatters Tat Days in Cambridge, Ontario, September 22-23, click for information HERE.

Wednesday, June 07, 2017

Same Doily, Different Background


By request, a different picture of yesterday's doily.

Tuesday, June 06, 2017

Done, Almost


Did you ever enjoy working on a project, but at the same time been so tired of it you couldn't wait to be done?  Here it is, in size 80 thread coming in at 10 1/2 inches, a little wider than my scanner bed.  Judging from my motif last time, I estimate it would be around 14 inches or more in size 40.  

Now, to finish.  I need to clip off the thread ends.  I worked in the ends as I went along, but I left long tails to prevent the chance of pulling out the ends in the stretching/blocking process.  That's not usually a worry, but with these tiny rings, there weren't a lot of stitches to work the ends into.

Oh, and to get this written into modern notation, which was the point to begin with.