Wednesday, March 18, 2026

IOLI 2026 Conference


I should have written about the IOLI (International Organization of Lacers, Inc.) conference sooner, since registration has been open already.  Some of the bobbin lace classes sold out right away, but there are still spots open in all the tatting classes.

The event will be July 19 - 24 in Durham, NC.  For full information, click Here.

I am teaching 2 full-time classes, meeting for 3 hours a day on Monday, Tuesday, Thursday, Friday.  Yes, that's a lot of classes.  For a smaller dose of tatting, my friend Gretchen Miller is teaching a Wednesday-only class making cute jewelry by adding tatting to her handmade enameled metal charms.


If you are in the neighborhood, the event will be open to the public on Wednesday and you would be able to visit the displays and vending room for free.


One of my classes is titled "Victorians Revisited," but is all new original patterns that use old techniques.  You probably know I'm obsessed with tatting history.


The other class is "Blocks and Buttons," combining block tatting with buttons.  Historic techniques, block tatting, buttons:  I've tried to include most of my favorite things.


Tuesday, February 24, 2026

Back by Popular Demand - Gloria's Maltese Bookmark


Lately, I've started getting requests for "Gloria' Maltese Bookmark,"  named for a friend I used to see at Palmetto's Tat Days.  The pattern used to be on my old website that went away.  (Remember way back when internet providers would give you a free webpage if you signed up for their service?)


Now I use Keep&Share to store pattern files for download.  At my membership level, I have a limited amount of data available, so I did not include all the old website patterns on my Free Pattern Page here on the blog.  By my calculations, I could squeeze in another file, so I cobbled together the original pattern and a tutorial that was supposed to go with it.  I have not tried to edit or update it, so I hope it makes sense.  Click on Free Patterns above and then scroll down.

Sunday, February 15, 2026

Finger Lakes Tatting Conference Registration Still Open

 One of my resolutions was to make my blog active again. Yeah, I know you've heard that before...

I have 3 tatting teaching gigs lined up this year.   The first coming up is the Finger Lakes Tatting Group Seminar, on April 10-12.  Look for information here:  http://www.fingerlakestatting.com/  Registration is open through March 31, and they say after that contact them to see if they can fit you in.  

It may not be the biggest, but I think it is the longest running tatting conference in America.  In the old days, we called it "Lodi" for short, since that's the town where they met, but now they have moved to the community hall in nearby Burdett, NY.  The Finger Lakes area is beautiful countryside.  The folks at the conference are so friendly it feels like visiting family for me.

They start off with an informal get-together at Karey's shop Friday afternoon and then there's a pot-luck dinner that night at the venue.  Your registration includes 2 classes each on Saturday and Sunday, with breakfast munchies and home-cooked lunch both days.  There's a dinner with a speaker for a small extra fee Saturday night.  Vendors: Tatting Corner, Karey, and maybe others will have threads, books, and supplies for sale.  There will be raffles and an auction.  I always have a wonderful time.

This snowflake is the class I am teaching, based on a really old technique.  Look closely at the unusual swirly picots.


This bee is a class Karey is teaching.  Isn't it cute?  Everyone gets a folder with all the class patterns, so I'm looking forward to making it later since I can't attend the class.

I'm hoping some of you can join us there.


Thursday, June 12, 2025

Block Tatted Rainbow


Block Tatted Rainbow 

Working in Ends with 2 Shuttles

©2008, 2020 Martha Ess


Lots of colors mean lots of ends to work in.  Here is a method using 2 shuttles for a fast way to add colors and work in ends.  I learned this from the dearly departed Terry McGuffin.


Rainbow

Materials: 3 shuttles, Aero/Aerlit or other round bobbin style recommended, (you may wish to have extra bobbins wound).  Thread in 5 rainbow colors: purple/lavender, blue, green, yellow, red/pink.  For best effect, choose all brights or all pastels.   Paperclip or coil-less safty pin


Begin with 2 shuttles wound CTM with purple/lavender.  Have another shuttle wound with blue standing by.  As you finish a color, you may use that shuttle to wind on the next color, or you may like to have an additional bobbin of green, yellow, and red/pink standing by.


Row 1: Hang a paperclip or safety pin on the thread between shuttles to hold open the beginning vsp

Ch:      vsp 6, [vsp 4] 8 times, vsp 1, then pick up the blue shuttle and hold it together with the purple shuttle in your working hand, and add the end of the blue thread into the pinch of your other hand where you are holding the stitches.  Holding the shuttles together, work 5 more ds. By holding the 2 shuttles together, the new thread end is encapsulated as you go. With the purple shuttle only, pull gently to adjust the tension to a gentle curve. Turn, SLT


Row 2: Adjust the shuttles so that the blue thread is wound around your hand as the ball thread.  Hold both purple shuttles together in your working hand and work Ch: vsp 6 ds, so both threads form the core.  (This works best with round bobbin style shuttles so you can make fine adjustments to the length of thread between the shuttles and stitches.) Cut off one of the purple shuttles. +LJ to the vsp of Row 1. Continue the chain: [4 +LJ (to next vsp)] 8 times.  Add a shuttle with green thread. As before, hold 2 shuttles in your working hand and work with 2 threads (purple and green) forming the core. Work 6 ds.  With the purple shuttle only, +LJ to the beginning vsp of Row 1.  Turn, SLT


Row 3:  Adjust the shuttles so that the green thread is wound around your hand as the ball thread. Hold the purple and blue shuttles together in your working hand and work Ch: vsp 6 ds.  Cut off the purple shuttle and +LJ to the LJ of the row below. Continue the chain: 4 +LJ (to LJ), [5 +LJ (to LJ)] 6 times, 4 +LJ (to LJ).  Add a shuttle with yellow thread. As before, hold 2 shuttles in your working hand and work with 2 threads (blue and yellow) forming the core. Work 6 ds.  With the blue shuttle only, +LJ to the beginning vsp of Row 2.  Turn, SLT


Row 4:  Adjust the shuttles so that the yellow thread is wound around your hand as the ball thread. Hold the blue and green shuttles together in your working hand and work Ch: vsp 6 ds.  Cut off the blue shuttle and +LJ to the LJ of the row below. Continue the chain: 4 +LJ (to LJ) [5 +LJ (to LJ)] 6 times, 4 +LJ (to LJ).  Add a shuttle with red/pink thread. As before, hold 2 shuttles in your working hand and work with 2 threads (green and red/pink) forming the core. Work 6 ds.  With the green shuttle only, +LJ to the beginning vsp of Row 3.  Turn, SLT


Row 5:  Adjust the shuttles so that the red/pink thread is wound around your hand as the ball thread. Hold the green and yellow shuttles together in your working hand and work Ch: 6 ds.  Cut off the green shuttle and +LJ to the LJ of the row below. Continue the chain: 4 +LJ (to LJ), [6 +LJ (to LJ)] 6 times, 4 +LJ (to LJ), 6 +LJ (to beginning vsp of Row 4). Cut and tie. (If you like the Magic thread method for working in ends, add that during the final 6 ds.)


Here is the basic pattern without the commentary:

Row 1:   Ch:   vsp 6, [vsp 4] 8 times, vsp 6. Turn SLT

Row 2:    Ch:   vsp 6 +LJ (to vsp of Row 1), [4 +LJ (to next vsp of Row 1)] 8 times, 6 +LJ (to beginning vsp of Row 1) Turn SLT

Row 3:    Ch:   vsp 6 +LJ (to LJ of row below), 4 +LJ (to next LJ), [5 +LJ (to next LJ)] 6 times, 4 +LJ (to next LJ), 6 +LJ (to beginning vsp of row below) Turn SLT

Row 4:    Repeat Row 3

Row 5:    Ch:  6 +LJ (to LJ of row below), 4 +LJ (to next LJ), [6 +LJ (to next LJ)] 6 times, 4 +LJ (to next LJ), 6 +LJ (to beginning vsp of row below) Cut and tie.


Friday, February 14, 2025

2024 - The Year of Winging It, Part III: The Dalek


This one likely won't mean much to you unless you are familiar with the Doctor Who TV series.

I don't remember quite when and why I decided to tat a Dalek, but suddenly it was something I very much wanted to do.  I needed it to have the authentic shape while also having a strong tatting/handicraft flavor.  Buttons! of course I needed buttons, and it may have been seeing a pack of gray buttons at JoAnne's that sent me over the edge.  Add in some bead caps and bicone beads and I was set to go.

I'll admit I needed some help in winging it.  I found a pattern to print and make a paper Dalek somewhere online and used that as a guide to shape the various parts.  The 9 sections making up the base include a few rectangles, but most are irregular shapes.  I thought I was so clever translating them into tatting until I realized what a jagged edge I had at the bottom.  After a few false starts, I decided the only way out was to go all around the bottom with 1 ds, picot, with the picots being varying heights to even up that edge.  The next round was 1 ds, CWJ (Catherine wheel join) all around, with the occasional vsp for joining the following dark gray block tatting rounds. Then on to more trial and error for the upper sections.  Everything was joined as I went, with no sewing or tying together except the arms and antenna were added later.

I was really happy how it turned out, but it was very hard, so I don't plan to make another one.


Wednesday, January 29, 2025

2024 - The Year of Winging It, Part II: Sunflowers


In the fall of 2023, I had the honor to help test tat for Shawna Wachs' book,  Flower Garden.  Around that same time, I visited the Van Gogh Immersive Experience.  And I thought, could I make her sunflowers to look like his sunflowers?  It was a few months before I could dive into that project, but yes, I could.  I started with her sunflower, daisy, and mum patterns and gradually reproduced the painting.  Sometimes, my flowers were pretty close to her patterns, and sometimes I used her petal style as inspiration.  Sometimes my flower centers were like hers, and sometimes they were not, to better imitate the painting.  So, that's where the winging it theme fits in.

Here's my completed, slightly 3D picture.  I'm quite happy with it, and it won first place for framed or mounted tatting at the NC State Fair.


Here are a couple of Shawna's flowers, made according to the book:


How I did it:  I found a copy of Van Gogh's painting online and printed it the size I wanted my picture to be.  I put that into a  plastic page protector.  As I went along, I compared my tatting to the picture to judge shaping and size.  As each piece was completed, I taped it to the page protector.  Once they were all done, then I sewed them onto the fabric.  A word of warning if you ever attempt something similar:  I made the printout 10 inches tall, planning to use a 8x10 frame since that's a common size.  I didn't realize that while an 8x10 picture fits inside the frame, the actual opening in the front is a bit smaller, so it looked too crowded.  Luckily, I had an 8 1/2 x 11 frame on hand and switched to mounting for that size.
More free advice:  picture frames in stores are expensive.  Framed pictures in thrift shops are cheap.  Take a measuring tape with you to the thrift shop to check the size.  Find one the right size and you can throw out the old picture and add your own.
 

Wednesday, January 22, 2025

News Flash - Finger Lakes Tatting Conference Early Registration

In case you didn't know...

The Finger Lakes Tatting Conference will be held this year, April 4 - 6.  I always have a wonderful time.  There is a great line-up of teachers coming (isn't there always?) This year's conference will be at a new venue in Burdett, NY, which looks closer to Watkins Glen than before.  Early registration discount price is in effect through February 1.  

For complete information, visit the Finger Lakes Tatting Group site HERE.


Below are projects from the class I will be teaching.  It looks like a Dorset button, but is made differently using a tatting shuttle, and then you tat a motif around it.


Wednesday, January 15, 2025

2024 - The Year of Winging It, Part I: The Hat


Looking back, my tatting year of 2024 was dominated by 3 large projects, all of which were marked by varying degrees of diverging from the pattern or no pattern at all.

The Online Tatting Class began the year seeking to recreate this hat from the April 1922 issue of Needlecraft magazine.  Vintage patterns are one of my passions, so of course I joined in.  You can find the pattern on their site here (select Tatted Hat Project).  If you are a member of their Facebook group, you can see the progress of assorted members.

I was going merrily along until the instructions called for attaching the 18 pattern repeats of the top of the hat to 8 motifs around the side.  No, no, no!  I must have symmetry! So my hat has 9 motifs around the side, joining to the top very nicely.  (The pattern also called for tying or sewing sections of the hat together, but mine is all tatted together with joins.  I'm stubborn that way.)  To get the top and the sides to fit, I altered that last round of the top, was that Round 13?  A slightly longer chain here, an omitted join there, and its diameter grew wide enough to fit.  The little fill-in motifs became ovals instead of circles to lie flat.  I made a few other changes as I went along.  So a little winging it led me to an improved version still true to the original.


Tuesday, January 07, 2025

Happy Belated New Year!

 Happy New Year to all my friends.... a week late.

How many times have I resolved each year to post more often on my blog?  Will this be the one?  Is the lateness of this post an indication that it won't?  Time will tell.

I'm moving into a new computer and haven't transferred files over yet, so here's the only crafty photo I have to share right now.  It's a Dorset Button, swirl pattern, worked in the traditional way, with Lizbeth metallic thread.  Instructions from "Dorset Ring Buttons" by Gina Barrett.  More on a nontraditional way to make a button that I thought up later.


Wednesday, January 17, 2024

Looking Forward to Lodi


I am honored to have been chosen as one of the teachers at this year's Finger Lakes Tatting Conference, to be held in Lodi, NY this April 12-14.  There are social get-togethers on Friday and classes on Saturday and Sunday.  See their website here for complete information:   http://www.fingerlakestatting.com/  Note that the early registration discount is in effect through February 1. 

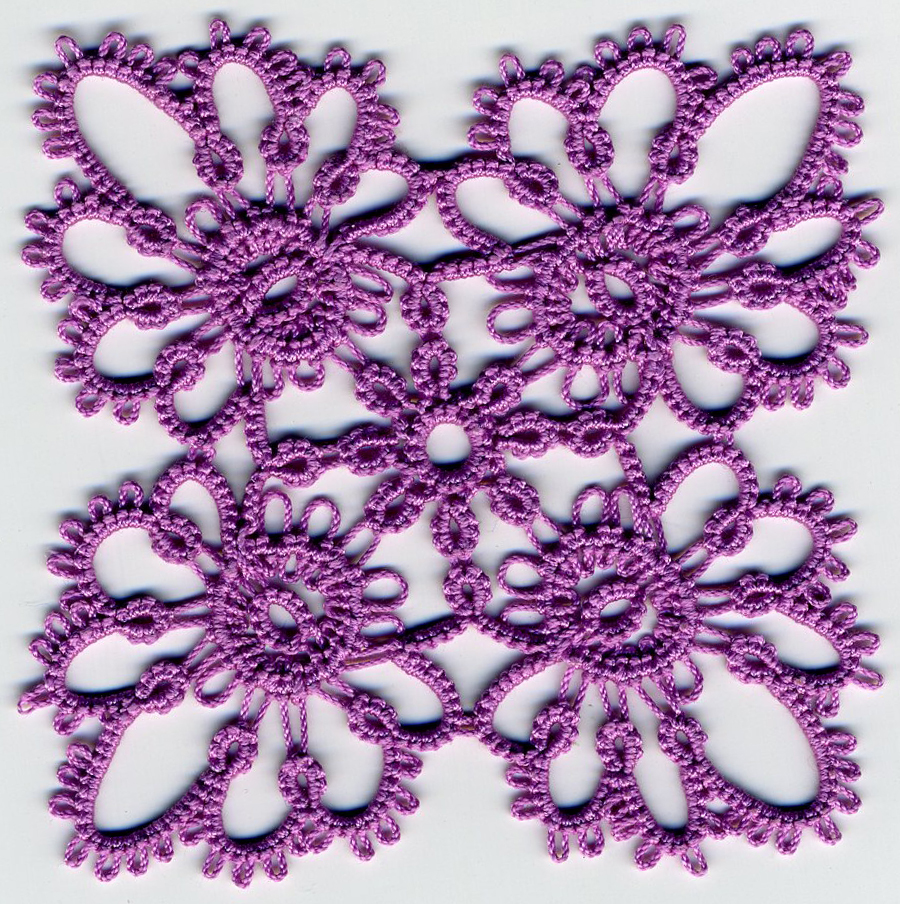
Here are 3 versions of the Maltese Ring motif I will be teaching.  I'm just now noticing that I never blocked some of these squares. How embarrassing! But if I don't post today, it may be too long before my next chance.
 

Other teachers will be K Boniface, Bonnie Swank, Mary Anna Robinson, Kaye Judt, Sharon Fawns, Shawna Wachs, D'Amone Popp, Ruth Perry, and of course, Karey Solomon.  Doesn't that sound like a great time?

Sunday, January 14, 2024

I Should Have Known Better


When choosing the thread/yarn for a project, I will pose the question, who's doing the work - the thread or the pattern?  Or to put it another way, the thread/yarn or the pattern may be busy, but not both.  Look at the socks in my previous post.  That yarn called for a very simple pattern.  I usually reserve variegated threads for edgings or small motifs, or alternate rounds with a solid color in a larger piece.  If there are several rounds of a variegated thread, the colors may pool or draw the eye away from the structure of the pattern.  Some people are better at this than I am and produce beautiful things with variegates.

Last summer, when I wanted to make Dora Young's Square Pinwheel, I had trouble finding a pair of threads I felt like working with.  There was a Lizbeth variegated ball (sorry, can't remember the number) with the colors all about the same strength.  I thought maybe I could pull it off, since Jane had made a very nice version of the same pattern with an ombre thread, but no, I just wasn't happy when it was done.  It's not horrible, but I don't think the pinwheel structure shows up as well as it should.  (The scan actually looks better than in real life.)  I switched to safer solid colors, sigh.

Incidentally, the technique Dora Young used in this pattern also appears in the Bath Tatting Book of 1865.  I've always wondered if she had a copy of that book, or independently recreated the technique.


Tuesday, November 07, 2023

I Gots Socks


Has it ever happened to you that your fallback project, intended for times when you couldn't concentrate enough to work on your important project, became the only thing you felt like doing?  So, while I have numerous works-in-progress and deadlines to meet, I have new socks.

The pattern is really simple, as befits a fallback project: Socks on a Plane by Laura Linneman, available on Ravelry.  Except, I substituted the Fish Lips Kiss Heel, also available on Ravelry, because that's the heel I always do.  The yarn is Patons Kroy Socks, color Sunburst Stripes.  I have no idea if that is still available.  

When I started, I didn't realize how loooong those color repeats would be.  The second skein didn't start in the same place as the first one, but I think I did a good job finding a place to begin the second sock so they more or less match.

They actually fit and look good, so I am happy.  But now I have to go back to all those things I was supposed to be doing, sigh.

Sunday, October 22, 2023

State Fair Ribbons


I love going to the NC State Fair.   I saw some clogging, listened to some bluegrass, ate some weird fair food, and got my yearly block of Cheerwine flavored fudge.  


I visited with Anitra at her tatting booth inside the Village of Yesteryear, had nice chats with a weaver and a potter, and saw many beautiful crafts.


The Exhibition Building houses the ribbon competition entries.  We do not have very many tatting categories, but quilting and embroidery are especially plentiful and exquisite.


I won 2 ribbons!  I got the blue ribbon for framed/mounted tatting with this square pinwheel Dora Young pattern.  I won second place in a catch-all "other non-threaded needlework" category with a set of bookmarks, all my own patterns, mostly from Playing with Picots.  Those were my only 2 entries, so I was very pleased they both placed.  Also, I was happy to see friend's names on ribbon winners in some other categories.


Each year as I walk through the fair, I think of all the things I can make and all the categories I can enter the next year.  Will I actually make all those things in time?


Thursday, September 07, 2023

Palmetto Projects


In an all-time record, I finished my Palmetto Tat-Days projects the evening I arrived home.  And then it is taking weeks and weeks for me to show them to you.

Up top are 2 classes with Karey Solomon.  The 3-D strawberry has an emery filling to help keep needles clean and untarnished, like the strawberry attachment on old-time tomato-shaped pincushions. Remember those? You could make one with regular stuffing if you don't have emery type materials on hand. The ice drop spider was a lot of fun, and the floating spiral chains were a useful technique to learn.  The legs are sticking out every which-way, and I could probably wet them and tame them into position, but that would be, you know, efficient.

Sharren Morgan's ornament class had a choice of 2 snowflakes and a wreath, which I made in unwreathlike colors, but will look good on my miniature white and gold Christmas tree.  I look forward to making the other ornaments in the class handout.  The wire tatting class with Kelli Slack was also fun, and something different.  The class assignment was just to get comfortable working with the wire and make rings and joins. I have more wire to play with later.

You will note that I have only 4 projects here.  I was teaching the other 3 class periods.  I have printed many of the other class lessons to make later.

You can go to the Palmetto website and see all the class projects and purchase all the class handouts as a digital download.  I recommend it.


Monday, August 21, 2023

It's Heeeere!


The new book is finally ready!  I hope you will enjoy it.  Click on "Books for Sale" near the top of the page for ordering information.


Wednesday, August 16, 2023

Knitting Dishcloths - Me Too

I've noticed friends posting their knit dishcloths online.  I've been doing that too!  They are perfect for when you want a very simple project while watching TV and it's so hot and humid it's hard to tat.  Two skeins of cotton yarn that I bought from Karey yielded 5 dishcloths.  They were finished too soon.  What can I make now?


Oh, were you expecting news about the new book?  I'll have some for sale at the Palmetto Tat Days conference this weekend and then start selling to the general public on Sunday or Monday.  
 

Tuesday, July 18, 2023

More Wild Women


I was honored and delighted when they selected my Wild Haired Women for this year's Palmetto TatDay's logo.  I'll be teaching a selection of them in my class there.  My upcoming book with have more hairstyles and a second body to choose from.  I think they are a lot of fun.  Instead of blocking them, I like to leave them just as they come off the shuttle, each with her own personality, like she is skipping or dancing.


Tuesday, July 04, 2023

Inspiration for the Oz Tatting

Someone said my Dorothy was pudgy 😢

(It's OK, just joking with the crying face.)

Since I'm working from the book illustrations, I don't think I'm too far off. Getting that ruffle all the way across the yoke of her dress without a cut and tie was a challenge, but I managed.  I'll stand by my Dorothy.


Sunday, July 02, 2023

More Sneak Peaks


Here are a few more motifs that will appear in my upcoming book. Maybe to be ready in August. Watch this space!

Thursday, June 29, 2023

New Book Coming!


I've been lazy with designing for a few years, but it's time to buckle up and get a new book done.  Look for it coming out sometime this summer (I hope).  

Whimsical Tatting will include assorted light hearted motifs.  These characters, inspired by the W. W. Denslow illustrations from the public domain original version of L. Frank Baum's Wonderful Wizard of Oz from 1900 will be included.

There will also be a puppy, a kitty, a space alien, some little dragons and a few more odds and ends.